S1. Making AI Images and AI Songs
skip to Session 2 - Using AI Chat
Session 1 - Outline for Students
Introduction. We start the course with AI created images because they are enjoyable to make and have uses in many areas of our lives. AI Art tools are also very impressive so illustrate clearly quite how different Artificial Intelligence is from anything seen before. This provides a solid base for discussing just what is going on in this exciting new world.
It can be useful here to quickly look at the images used throughout this site, particularly the banners at the top of each page. They outline the wide range of AI Art content that can be quickly achieved.
This is also a good time to briefly read our non-technical FAQs about AI. These topics will also get touched on regularly in class discussions.
Our latest [2025] 'Intro to AI Music' in a form useful for presentations
Our latest [2025] 'Intro to AI Art' in a form useful for presentations
1. Why use AI to generate images? Many of us find it very difficult to draw anything. A lucky few have talent as an artist using traditional techniques with pencil or paintbrush. Whether AI Art offers something to the second of these groups is a controversial issue. Later discussions here will look at issues of copyright and morality in AI Art. Here though are some obvious things that AI sourced art can provide:
a. Amusement - that is, the simple pleasure of producing artwork in a wide variety of styles.
b. Illustrations - to be added to writing you are doing to make it more interesting to read.
c. Memes and cartoons - images that have some amusing or meaningful content including words.
d. Replacing clipart in documents or websites you make with your own improved images.
e. Replacing paid copyright images - so there is no longer any need to worry about having to pay a fee to use an image.
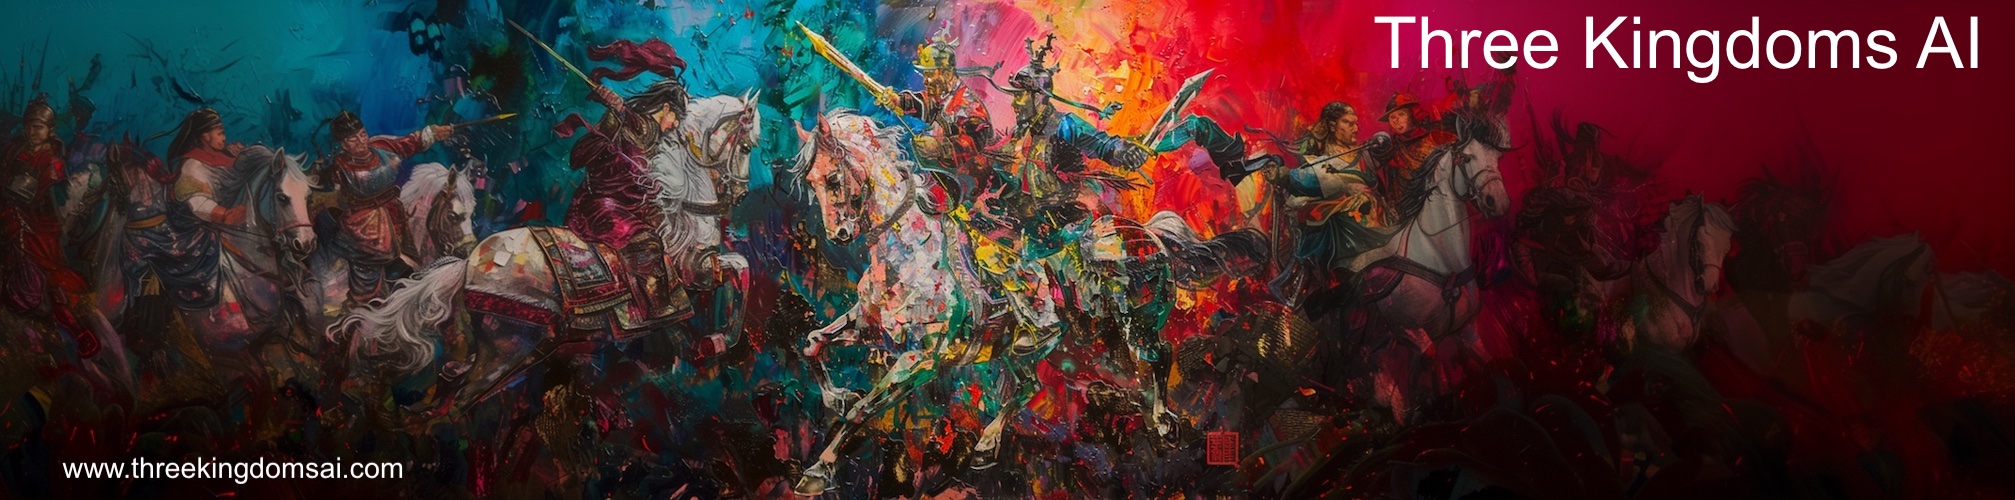
For example, the following main banner for this Romance of the Three Kingdoms website took less than twenty minutes to produce and there are no copyright issues to worry about.
f. Creating a business - selling images, perhaps framed or as cards etc.
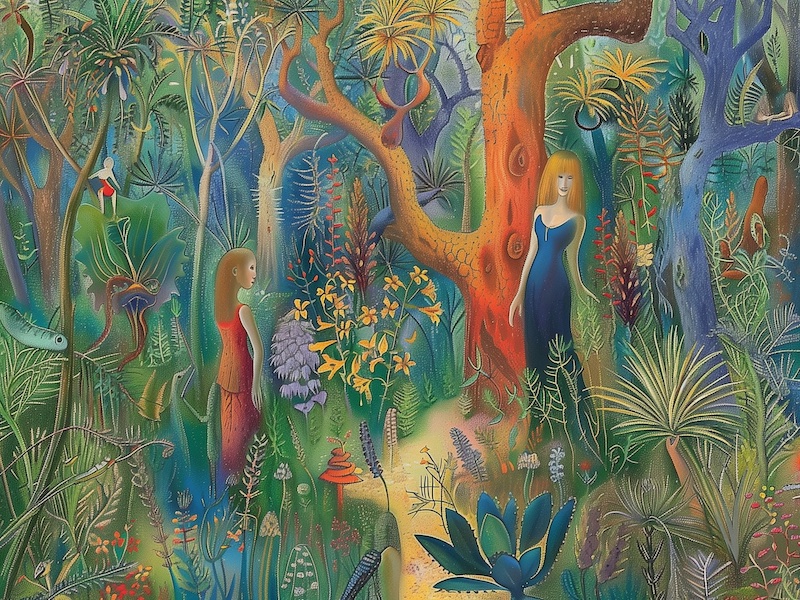
2. Midjourney as an example of an AI art tool. Midjourney is used here to introduce 'AI Art' because it is one of the most powerful available tools and so it makes it easy to show what AI Art is all about. Later other tools are introduced such as DreamStudio which come with a free trial - Midjourney does not offer that at the moment. The image below of an exotic garden shows an example of the type of complex image of which Midjourney is capable.
2.1 Available AI Art tools develop rapidly. The following links show some examples. Google Gemini, launched in Aug 2025, once used the codename 'nano banana' and has good free use limits. Grok (the AI from X) also has free use at the moment. Midjourney is great but has no free option. Ideogram has a free option with limited daily use.
[1] Midjourney AI Art in 2025
[2] Google Gemini AI Art in 2025
[3] Grok AI Art in 2025
[4] Ideogram AI Art in 2025
[5] OpenAI ChatGPT AI Art in 2025
[6] Microsoft Copilot AI Art in 2025
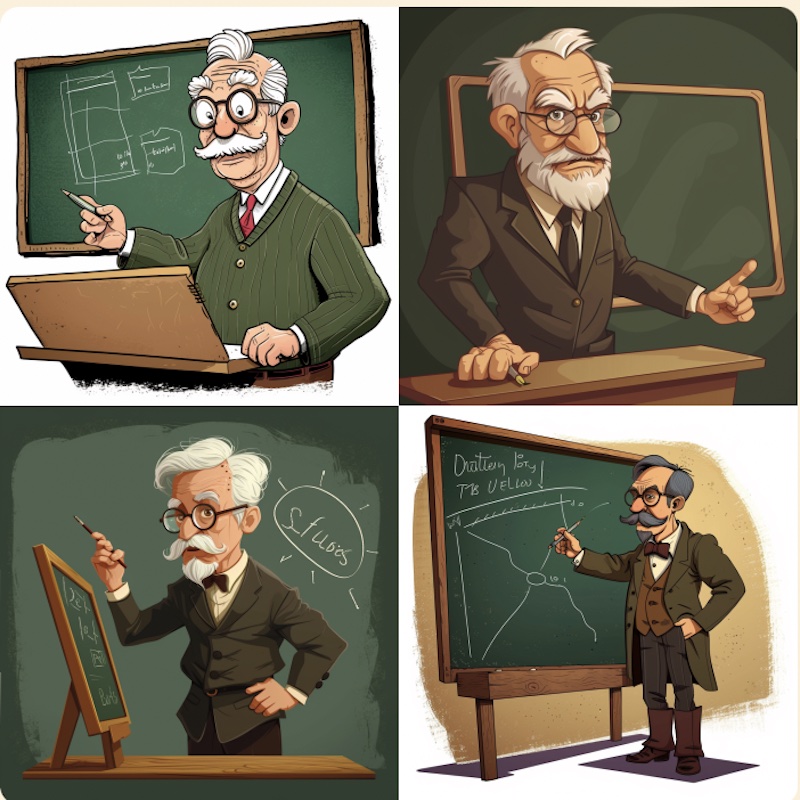
2.2 Evolving an image. In this session we start with a fairly unexciting picture produced by Midjourney using its Discord interface, and evolve it into something better. Our starting point is a response to the prompt: "strict old-fashioned teacher at blackboard". This is intended as an illustration for an older person trying to create a picture about what their schooldays were like when they were a young child.
In the following sections we will use this image to produce something more interesting. This is a common process in AI image generation. An image may typically go through 3 to 10 stages (or more) before the desired result is achieved.

Please note that the precise instructions used and indeed the whole interface changes rapidly so regard everything here simply as examples of the kinds of things that you can do using AI art tools.
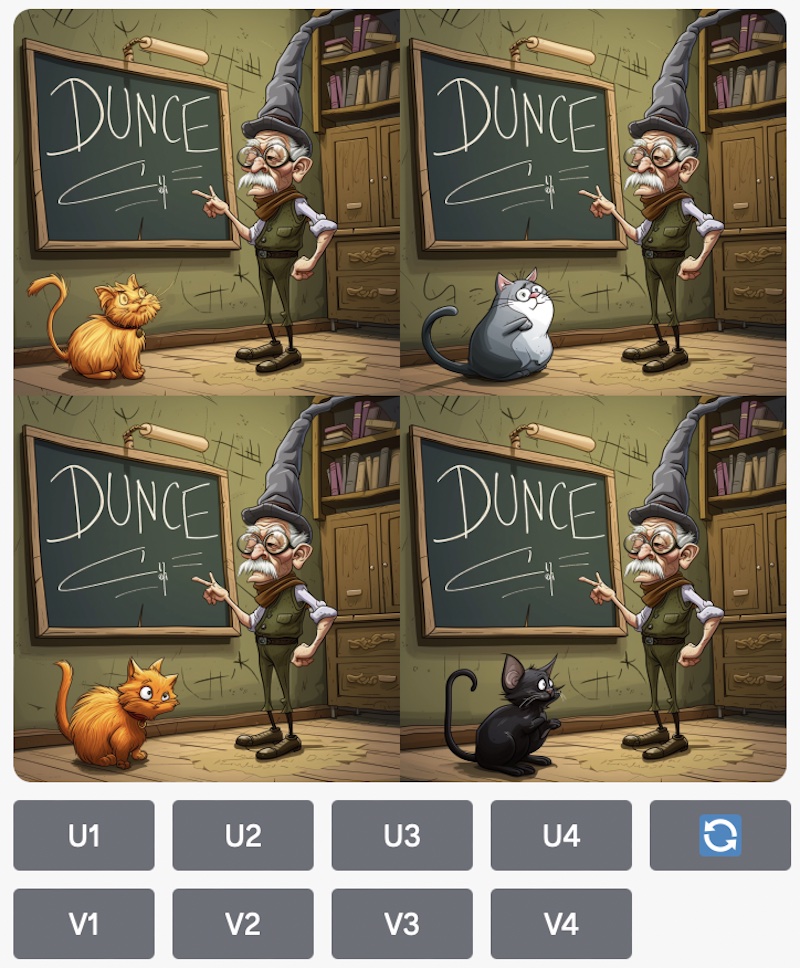
The buttons below, U1 to U4, allow the user to choose a particular image to be 'upscaled' (made bigger). The buttons V1 to V4 allow one of the images to be used as a basis for four further images. Finally the circular arrow symbol is a simple request to start over with a new set of four images using the same prompt.
3. Asking for particular styles of images. If the prompt is changed a little to read "cartoon style strict old-fashioned teacher at blackboard" then our original idea provides a cartoon image as below. There is really no limit to the styles you can ask for, though you may find the software stops you precisely copying styles from living artists and others with copyright protection.
If you have not already done look at the 'artist styles suggestions' link on the Midjourney page for ideas.
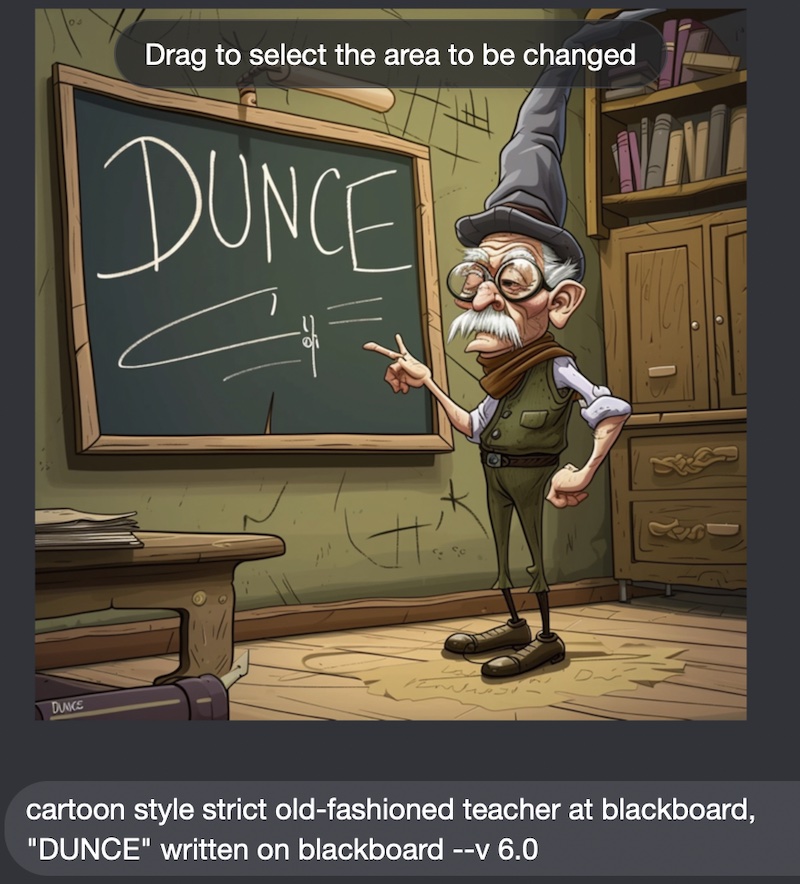
4. Adding text to images. Going a stage further, if the prompt is extended to "cartoon style strict old-fashioned teacher at blackboard, "DUNCE" written on blackboard" then the image below is produced. Not all of the options have the word written perfectly but it is pretty good. A short while ago none of the tools could write and position words very well at all. Soon it will surely be a standard feature.

Here we will select U2 which gives us a larger version of the second image (counting from top left).
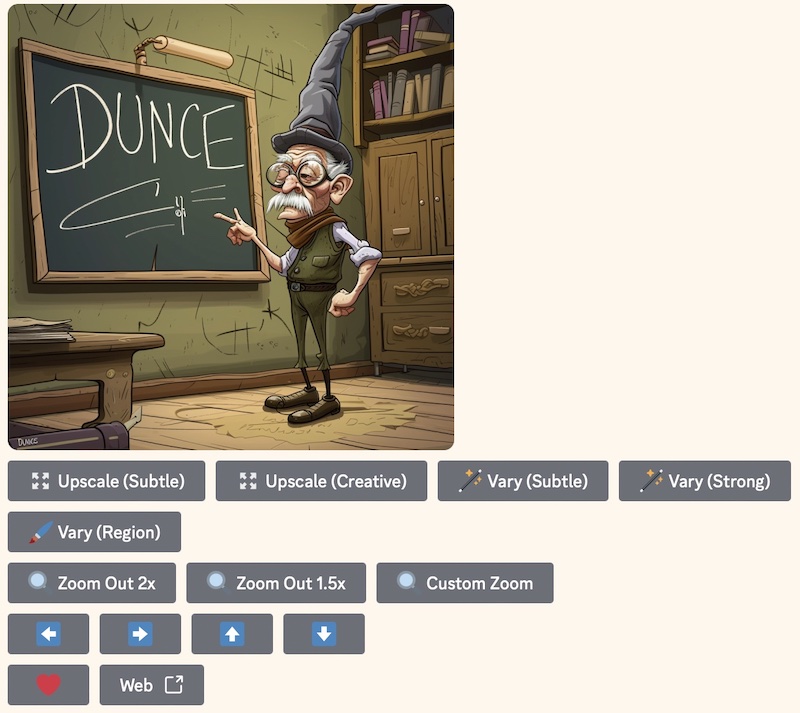
5. Changing just part of an image. Notice that we now have a wide range of further options below the image. One of those allows us to change just part of the image we have. We will add some humour by changing the desk at bottom left to a cat as the teacher's audience. The Vary (Region) button takes us to the following screen.
Here we do two things:
a. Drag the mouse across the bottom left of the image where the desk is.
b. Change the prompt to read: "Teacher talking to cat".
Once again we get four images to select from. Notice that the majority of the image is unchanged, but in the bottom left we now have a choice of cats.
A difficult choice but selecting U1 gets us an 'upscaled' (larger) version.
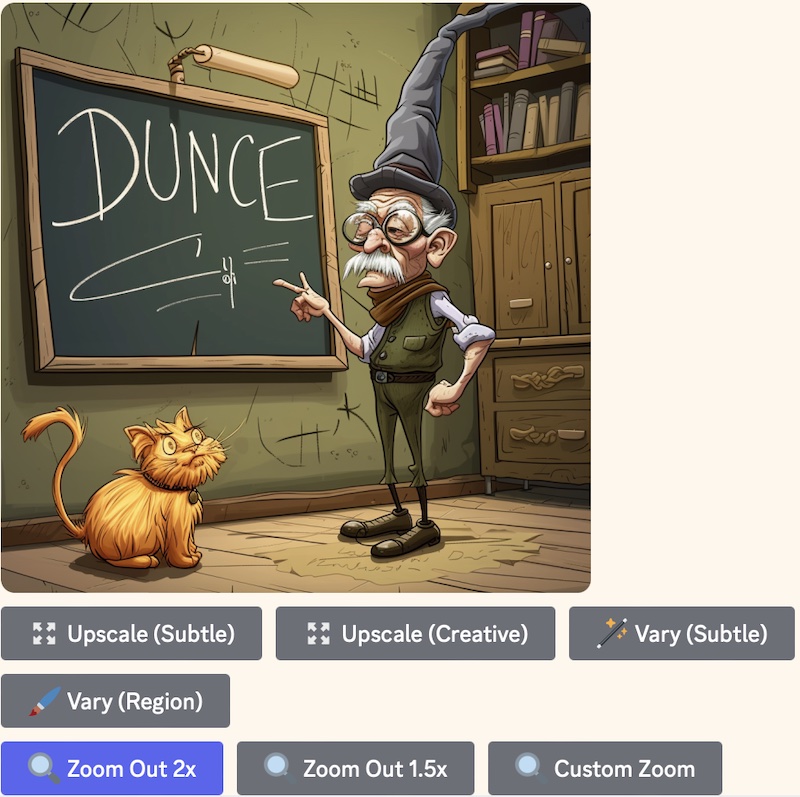
6. Expanding an image. Notice now the blue Zoom Out 2x button, which is blue because it has been selected. That challenges the AI Art software to imagine what is outside of the existing picture.
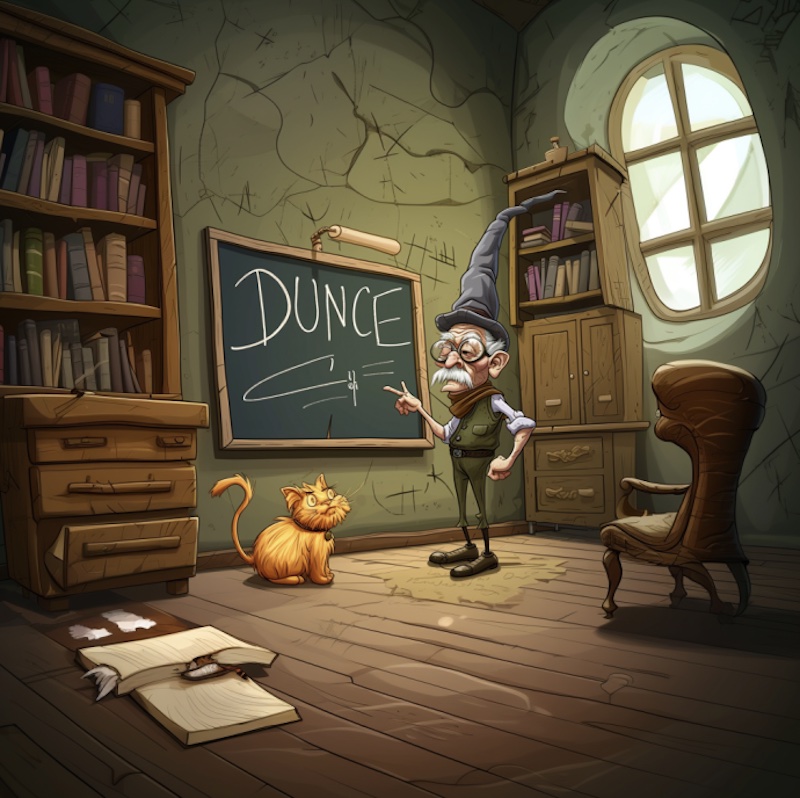
Each stage here took less than one minute for image creation. There were no hidden tricks and no special knowledge is needed.
Note that the image expansion can also be limited to a particular direction. if you look at the banner image at the top of this page you will see that it is three times wider then it is tall. This was also done with Midjourney.
7. How are these images produced technically? This is a good place to visit the page here about the logic used by most AI Art tools at the moment. You do not need the theory to use them but it does actually help with some ideas that arise in the later session about advance AI Art.
Link: What is the 'Diffusion Method' of producing AI images?
8. Next steps. All of the interesting and powerful examples above are at the most basic level of text to image creation. In Session 3 we will move on to look at more complex aspects such as:
- using one image as a starting point for more images
- achieving consistent character appearance through a long sequence of images
- upscaling existing images to a much higher quality for printing and more
- transforming images consistently to radically different styles
and
- producing long video from simple text or image beginnings
Below are suggestions for AI Art tools that allow 'free' use and also some challenges that can prompt anyone who needs inspiration to get started.
9. AI Art Tools with free use There is a separate page on this site where we keep information on available AI Art tools updated. Summary of AI Art tools. Here are two quick suggestions, information as at 18th March 2024.
9.1 DreamStudio AI. There is a separate page for this. The important thing is that it gives you the student some free credits without needing any credit card etc.
Link: DreamStudio for AI images
9.2 Leonardo AI. Allows a free 'daily' allowance to tempt you to sign up for more.
Link: Leonardo link to create an account.
10. Art + Song Challenge. In remaining time now or before the next session find an AI Art Tool you are happy with and also get familiar with making songs using the free option on Suno.ai (or Udio).
You need to generate (a) a square image of your subject, and (b) a short song that matches it.
You can just prompt Suno.AI to give you a song. Better still is if you use the 'custom option' that allows you to enter your own lyrics.
If you are on a WhatsApp Group for the course then show others and compare notes. Then, when you are happy with what you have you may be able to email the link and the image to your tutor who may (given time) assemble them into a video to embed on the course website. There are examples below. There are various tools for doing this though they are not part of this course and you are not expected to use them. One good one is for Runway runwayml.com/ which has lots of inbuilt AI tools, for example for adding subtitles.
Example Student 'Song + Image + Subtitles' Videos
Link to YouTube Channel for Student Videos Please subscribe!
Song 5. The Awakening
Powerful self-written lyrics in this @suno_ai_ song from our student SS showing how valuable this tech is for allowing people to express themselves. 🥲 pic.twitter.com/3AgzuJ9olb
— The Silver AI Project - free training course in AI (@SilverAIProject) April 12, 2024
Song 4. Celestial Resurrection Song
Congratulations to student MS for his first https://t.co/w8qNDvO8wu tune.
— The Silver AI Project - free training course in AI (@SilverAIProject) April 1, 2024
Very seasonal. 'Celestial Resurrection Song'. pic.twitter.com/HnRayOYhVC
Song 3. The Word is on the Street
Congratulations to student MH for his first https://t.co/w8qNDvO8wu song.
— The Silver AI Project - free training course in AI (@SilverAIProject) April 1, 2024
"The Word is on the Street" pic.twitter.com/bSNN2Clu3y
Song 2. Gemima and Jane
Congratulation to student SG for this composition which aims to give confidence to her grandchildren.
— The Silver AI Project - free training course in AI (@SilverAIProject) April 2, 2024
😀 pic.twitter.com/PmIUPpAjFb
Song 1. Surrender to a Small Town
Music by @suno_ai_ with image by @midjourney stitched together with subtitles by @runwayml for lesson by @SilverAIProject 🧐🧐🧐 pic.twitter.com/kKIh1Own4I
— The Silver AI Project - free training course in AI (@SilverAIProject) March 30, 2024
If you need more challenges then consider:
Challenge 1 - a famous picture in a new style ("Girl with a Pearl Earring in Steam Punk style")
Challenge 2 - a design for a card for a celebration of some kind (wedding, birthday etc). Words not required.
Challenge 3 - a cute picture of an animal or animals, domestic or wild
or, of course, something that fits with your own special interests.