S3. Advanced image creation and AI video
skip to Session 4 - AI Aided Writing
Session 3 - Outline for Students
Overview. In Session 3 we look at more complex aspects of AI image generation such as:
- using one image's layout to structure next image (Part A1)
- achieving consistent character appearance through a long sequence of images (Part A2)
- upscaling existing images to a much higher quality for printing etc (Part A3)
and
- producing long video from simple text or image beginnings (Part B1)
Our latest [2025] 'Advanced AI Art' in a form useful for presentations
Our latest [2025] 'AI Video Overview' in a form useful for presentations
Part A1. Arrangement of objects in an image using base image
A1a. The problem. In Session 1 where image generation was introduced, the focus was on describing the image wanted in words then letting the tool do the rest. The user's only input really was at the prompt stage and in selecting between images. So the user may get an image that matches the prompt but the objects within it may be in the wrong place or of an incorrect relative size for the desired outcome.
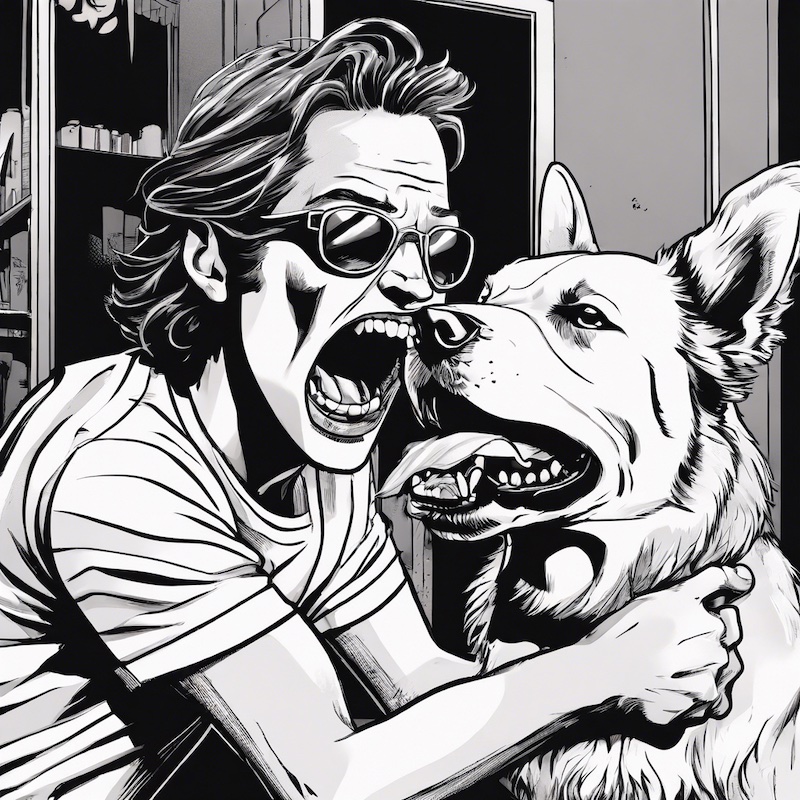
One way to get better control is to start with the rough shape of the image you want. To show this below first is a standard DreamStudio production of a prompt "man biting dog".

A1b. Using one image to generate another Here a particular image has been selected because it has the general required layout. The details happen not to meet the user requirement however. Here we download it and save it on our computer. On many tools this may not be necessary but it also shows the case where your starting image in not from DreamStudio.
A1c. Same image layout, different style. In the image below the previous image has been uploaded and then the slider has been set to 16% which means that it has been degraded considerably. To the human eye it seems as if there is little information remaining, however to the tool there is plenty. The prompt is changed slightly and a different style is chosen (neon). Notice how the results retain the same general layout as the original as desired.
Note that there are no hard and fast rules about the percentage to choose. Set it too high however and you will simply reproduce the original, or something very much like it.

So our final selected image might be this one.

A1d. Steps and seeds. Before leaving DreamStudio it is worth looking briefly at the Advanced section of the panel - see below.

Steps This is the number of stages the tool uses between starting with a noisy image and producing the final one. In general it is good to stay with the default but do experiment and see what effect it has on your project. Potentially with some tools changing this may have an effect on the costs involved and the time to produce an image.
Seed As covered elsewhere, the seed is a number like 549836 which is put into a random noise generator to produce the initial image. If you repeat the seed then you should end up with a very similar end image. Normally it is set to 'auto' which will ensure a different value every time.
Part A2. Consistent characters across multiple images
In Session 4 of this course an AI Chat tool is used to develop a fictional story set in an English country public house. In that is a girl, Jamie Carter, still a teenager living with her parents who run the local bakery. She is known in Upper Duckpond for her precocious nature and love of literature.
Imagine that the story is to be illustrated with various images of the characters going about their investigations (it is a detective story). To achieve this Midjourney is given the prompt "Teenager Jamie is an observant, intelligent, and quietly witty girl". Midjourney is used here as they have achieved quite a good character consistency method, which will doubtless improve further.

From this one was chosen. The challenge is then to create other images that are consistent with this one.

The first request was to show Jamie in a garden.
The Midjourney prompt was as follows. It is explained below.
Jamie in a garden --cref https://cdn.midjourney.com/4195d3b9-defd-4689-a047-40107d18e2cd/0_2.webp --cw 0
Explanation of prompt. The --cref prompt is followed by a URL. That URL (web address) is obtained from the properties of our Jamie picture above. The --cw 0 apparently says just to focus on copying the face. For more see Midjourney support. Remember that you can repeat the same request again and again until you have the image with the look you want. Also many of the images will probably turn out to be useful even if not quite as originally desired. Luck plays a big role in AI art.

Next here is Jamie on a bike.

Then, as in the story, Midjourney is asked for images of Jamie (using the original picture) in a bar. This produces a fairly convincing set as below, at first glance at least.

Looking more closely however, in at least one of the images (see below) Midjourney has given Jamie extensive tattoos - not what was expected! Of course, if we mentioned this to ChatGPT which wrote the fiction story seen in Session 4 no doubt this would be incorporated into its story about 'The Goose's Gobble' public house.

Below is a second example of Midjourney character consistency, starting with the lefthand image. The tools will continue to improve so you can now create your illustrated story, make a fantasy social media influencer, or do whatever you can imagine! Of course, as we will see, having consistent video characters is the inevitable destination.

Part A3. Upscaling images (adding fine detail).
If you wish to get your artwork printed in anything other than a postcard size then you have to ensure that it has the immense detail needed when it is blown up to a large size, for example for a wall poster. The following AI tool is shown as our first example. We do not recommend you sign up unless you have deeply researched it yourself as there is no free option and prices can be substantial. Do view the examples on their homepage though which explain clearly what is being done.

The tool is Magnific AI Magnific.ai and if you scroll down on their homepage you can see a lot of Before and After images. Note that the tool cannot magically obtain detail from a relatively blurred image (as is shown on many a police drama) - instead it 'reimagines' each area of the original. The effect can be stunning as you will see. There is an FAQ page if you wish to know more.
Many other AI Art tools offer 'upscaling' but we do not look at those further here.
Part B. AI Video
In early 2024 OpenAI demonstrated Sora which was the first real "text to video" AI system. It was not released for public use however and it is believed there are discussions with Hollywood studios about it. Nevertheless, in late Nov 2024 there was a leak of a version possibly scheduled for open release. Meanwhile many others have developed systems. First we look at Sora.
B1. OpenAI Sora - video from text. openai.com/index/sora. It is worthwhile visiting the website to view the examples which are extremely impressive. When it is publically available, the demand for it and the resource requirements are going to be extreme. Do not expect free use!

OpenAI's video introducing Sora
See the Sora website (linked above) for original Feb 2024 versions, or below for Nov 2024 leak.
Every OpenAI Sora Leak:
— AI Central (@AICentral_) November 27, 2024
1. pic.twitter.com/0KTJfdtltW
Leaked OpenAI SORA is f*cking good 🤯 pic.twitter.com/jnKcWOOrfr
— Haider. (@slow_developer) November 26, 2024
There are many others in the market, for example Kling AI, Luma Labs etc and Runway as seen below.
Tribute to all the builders of space thanks to whom humanity will be multiplanetary!
— Déborah (@dvorahfr) January 15, 2025
The images were generated with @grok and animated by @Kling_ai pic.twitter.com/IzchNtAldo
B2. Runway - video from text, video editing and more runwayml.com. This gives you some FREE CREDITS when you sign up and is then available at a monthly subscription. It is a well established tool which does a range of useful things which makes it a little difficult to define. These include:
- text and/or image to image
- text and/or image to video
- training an AI to make custom sets of images
- image expansion (at edges) and infinite image, also image upscaling
- erase and replace, and backdrop remix
- super slow motion for video
- video audio improvement and subtitle addition, also green screening
One project that uses Runway is aVideobook.com which uses prompts and lyrics by X's Grok 3 on Midjourney for art, RunwayML for animation, and Suno for music. View the output as a playlist on our aVideobook YouTube channel.
Text to video with Runway. This has progressed very powerfully recently and now (August 2024) offers 'Gen-3' which generates ten seconds video (which quickly eats up your credits). For example, the following is a clip from when it was given a Midjourney image of a princess talking to a man, with the prompt "Princess talks to her new lover".
Giving Runway Gen-3 an image lets you peek into other possible worlds ... pic.twitter.com/Oyl3lMlOB1
— The Silver AI Project - free AI training materials (@SilverAIProject) August 2, 2024
Here is an example of a simple project. First a Midjourney image (prompt: 'kitten juggling bubbles') then that is used as the final frame in a ten second Runway 'Generative Video' clip. ChatGPT was asked to produce a simple poem and then Runway's 'Generative Audio' is used to voice that. Finally it is assembled as a video using Runway and published to X.
— The Silver AI Project - free AI training materials (@SilverAIProject) November 27, 2024
Or with music from Suno ...
Midjourney to Runway Gen3 plus Suno pic.twitter.com/1Tk4rgkxZk
— The Silver AI Project - free AI training materials (@SilverAIProject) November 28, 2024